

 Once the period is over, we all SQUISH what we have made and return it to the clay bin. Students then work together to make a list of all the things you can do with clay. Here is what we have come up with:


First Grade: First graders are working with clay! The ceramics unit is a very exciting time of year. We will be exploring where clay comes from, what you can do with it, and what happens once it dries. The students will be working on a texture exploration to see what happens when clay is imprinted with different materials. Each student will create a pinch pot that is textured with the materials of their choice. We will then paint our work in a way that highlights the textures we create.
Second Grade: Second graders are beginning a sculpture unit. We will be studying the job of playground designers. We will look at different interpretations of playgrounds from around the world. Each student will imagine his or her ideal playground. They will use paper to create a three dimensional sculpture of their own play-space. For inspiration, check out one of my favorite blogs: http://playgrounddesigns.blogspot.com.
Third Grade: Third grade artists are working on the art of shadow play, a traditional art form first invented in China over a thousand years ago. We will be creating many different shadow puppets (pi ying) based on animals, creatures, monsters and ourselves. We will be learning about how using positive and negative space affects how the puppet looks when lit. We will also be exploring how artists can add sound and movement to their work.
Fourth Grade: Fourth graders are working on a relief sculpture unit. We are looking at the work of AJ Fosik and creating large animal heads out of papier mache and cut paper. We are thinking about how Native Americans believed that animals represented and had personality traits. Each student will choose an animal whose “personality” is similar to his or her own. They will then create a relief sculpture to represent their animal. Please send in cereal boxes, newspaper and cardboard tubes!
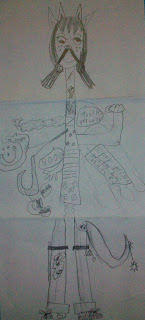
Fifth Grade: Fifth graders have been working on creating realistic drawings and paintings for the past few weeks. Taking a break from this, we will be exploring how artists create characters from their imaginations. We will look at many different artists who create fantasy characters, including Tim Burton, who now has an exhibition at MoMA. Each student will use pen and ink, watercolor and clay to create an imaginary character.


Good morning everyone! We did an amazing project on Friday, and so many of the 4Fives wanted to write about it! So we decided that it was okay to do that, and you can read each of our posts about our experience!
Get READY! HERE WE GO!!!
Friday was a really fun day for us because we did silk screening! It was a really fun thing to do. First, we went to the art room, and Ms. Kimball said to go sit on the rug. Then, she showed us a video about silk screening.
It was really cool to see that video. Next, Ms Kimball showed us how to put our t-shirts over cardboard to prepare them for the screening.
Then she said to go to a table. She put paint on the screen, and we used a squeegee to move the paint over the screen and onto our shirts!
Then Bee asked me to take video of the silk screening with the Flip, so I did. Next I videotaped Ms. Kimball do the silk screening on our t-shirt. When it was done, it looked amazing! It had the 4Fives logo on it! We all did the silk screening on our white t-shirts. It looked more amazing on the white t-shirt.
At the end, I used the Flip to videotape me and Bee. Check back this week to see what I taped!
Love,
Adrian
—–
Hello! I am going to talk about last Friday. We were silk screening our t-shirts in the art room. Our art teacher helped us with the t-shirts, and our logo was on the t-shirts and every body was happy. We went to the line and the art teacher showed us how to do the silk screening on our t-shirts, then we got too happy!
We were with SFJ2 and he brought his t-shirts and he got a gray t-shirt and the old people were last on the line to silk screen and the little kids were in the front of the line to silk screen.
Our logo was on the t-shirt, and our art teacher and regular teacher made one too.
We was getting this material that Bee was not using, some recycled old fabric that she had at home, and she tore it into squares for us to silk screen on. So we made a logo on that square shape thing and it looked good on it, but we ran out of it, so some of the kids were drawing and that was me, John and SFJ2.
By
Emanuel
—–
Hello everyone! I am going to tell you about what happened on Friday. On Friday, we were silk screening on our white plain shirts.
We put green paint on a screen that Ms.Kimball had put our logo on.
When we were done silk screening our shirts we all got a peace of fabric and silk screened it too.
We also drew on a piece of paper. Then me and SFJ2 were playing around.
This was the first time I silk screened, it was the best day ever!!! Adrian was filming for us and we all had a wonderful day. After silk screening, our hands were all green we all got a wipey to clean our hands and then we all went home.
Love,
Jonathan
—–
On Friday, we brought in t-shirts to do silk screening. Ms. Kimball showed us a video of how a person made a slider to put the print on our shirts. We start to practice putting our logo on a sheet of paper. Then everybody got a cardboard and we put our shirts inside it.
Then we began to do our shirts while Bee was ripping pieces of fabric to do our logo on after we finished putting our logo on the t-shirts. Ms. Kimball said when everyone is done making their logo on their t-shirts we can get another shirt and do our logo on it. SFJ2 came and did a t-shirt. Jackson didn’t come but we made him a t-shirt. Then we did our logo on the fabric that Bee brought in and when we finished we set it on the rug.
So everyone wake up because if we show you guys how to silk screen you’ll probably want to do it also!!!!!!!!!!!
So if you want to do it you can ask the 4Fives because we can help you.
From your friend,
Malaysia
—–
Last Friday, the 4Fives did silk screening once again. First, we saw a video about silk screening and how the ink gets transferred on things. Then we went to the table with Ms. Kimball. Then we did a practice silk screen on paper together as a group. Then we all had to line up and wait to silk screen our t-shirts. While we were doing that, Bee was tearing up some pieces of fabric for us to silkscreen on. Then the principal came up to see us silk screening.
We all had to stop for a minute and pay attention to the art teacher. Ms. Kimball put tape on the table just like a square and she told us to put the fabric piece in the little box. Then Nicholas was in charge of holding the sides of the silk screening board. The 4Fives then got a chance to do it on their own. Then Adrian was in charge of ironing the t-shirts after they dried, so the paint would set and not wash out.
Here are the steps for silk screening if you want to do it too.
Step1. Lay your T-shirt under the board.
Step 2. Hold the squeezer with both hands together.
Step 3. Slide it down gently.
Step 4. Take your shirt under from the board.
Step 5. Take your t-shirt and put it some place where it can dry.
Step 6. Then iron your T-Shirt.
Have a great day,
Love,
Maya
—–
Good morning every body! I am going to tell you about what we did on Friday. So what we did on Friday, was that we did silk screening and it was so amazing because we got to bring shirts in. And the reason why we needed to bring shirts in, is because we needed to put our logo on our shirts.
And now I am going to tell you the details of how to silk screen.
First you have to put paint on the screen on the table.
Then, you get this smooth kind of squeegee brush and spread out the paint.
And then you get your shirt, and then get in line.
And then you put your shirt underneath the screen.
And then you need to put your shirt neatly down, and then nice and hard pull the smooth brush across the screen.
And then when you take it from underneath the screen, it will have the 4Fives logo on your shirt!
And after that we got to do our logo on this kind of fabric that Bee tore up and then Bee said that we can put the logo on it for another project that we will do later.
And I forgot to tell you who came in our room………it was……………
JACKIE (SFJ2)!!!!!!!! and it got really fun because when every body was done we all got to color. It was a great day.
Love,
Taliya
—–
On Friday, at the end of the day, we went to art, and we were going to do silk screening. We had our shirts to get started, but Ms. Kimball showed us a video of how you do silk screening first. The video showed you how you put the paint on the screen and you move it back and forth so it could spread out over your design.
After we saw the video, we went to the table and we took our t-shirts out and put them on a square cardboard. Next, we took a jar of paint and put it on the silk screen. Then we took our t-shirts and lined up for our silk screening.
When it was my turn I first took my shirt with the cardboard and put it under the silk screen frame. I put the silk screen on the shirt and pulled the squeegee down and I when I picked up the frame, our logo was on the shirt!
Love,
Travis
—–
We hope that you enjoyed our posts!!! We will be putting up videos from our day this week, so keep checking back!
Love,
The 4Fives
THE BEST CLASS IN THE WHOLE WORLD.
Thank you 4Fives! I had so much fun!
MK


